Why cherry-pick?
Git's cherry-pick command is used to copy the changes introduced in a single commit onto a branch as a new commit. This command is useful in situations in custom software where you know you need a specific change applied to some other branch of your repository, and you also know that the changes made in commits prior to the commit you're cherry-picking are not needed.
Common scenario where cherry-pick can be applied:
A defect is found in production and a fix needs to be implemented against the production-level code. Once the defect is fixed, you'll want to bring this code change back to the development branch so the defect won't be re-introduced into production with a future update.
The first option to consider is whether a simple git merge would work. If a merge is possible, that would be the ideal solution. However, if there are other changes that have been made on the production branch that shouldn't be brought back to the development branch, a merge would not produce the desired result since it will include all the changes made to the production branch.
This is the case where cherry-pick is the right answer. Cherry-pick will focus only on the changes included in the commit that was made to fix the bug without bringing along other commits.
Are you confused yet? Maybe a visual will help.
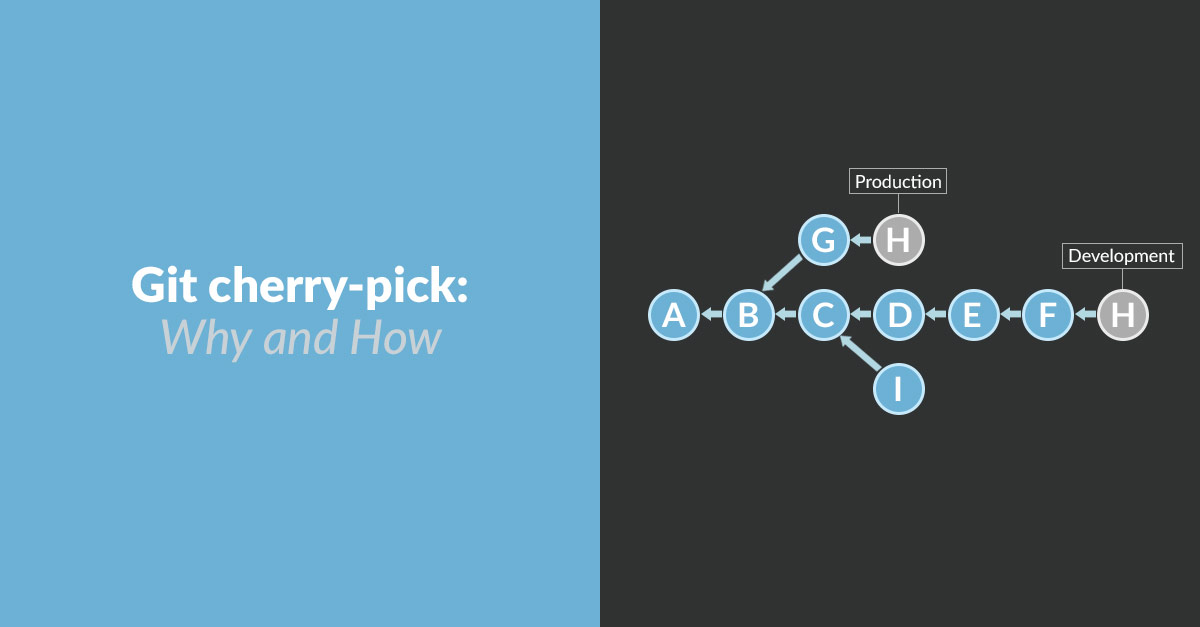
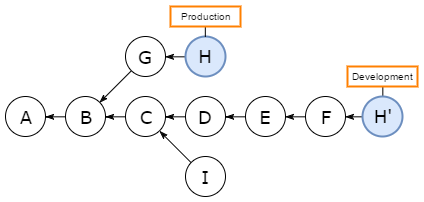
Let’s take a look at a brief illustration of this scenario, showing how the branches are different and what happens when a commit is cherry-picked.
Figure 1: Problem is found on the Production branch. A fix for the problem is developed in commit H, but commit G does not need to be applied to the Development branch.
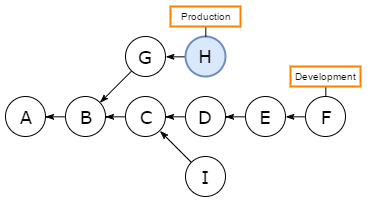
Figure 2: Commit H is cherry-picked onto the Development branch, resulting in commit H'. Note that the changes made in commit G are not included on the Development branch.
How to cherry-pick in Visual Studio:
1. Make sure your local git repository is current with the remote repository. Pull all branches involved: The branch that has the commit you want to cherry-pick and the branch you want that commit applied to. For example, if the commit is in the UAT branch and you want to put it on the master branch, make sure you've pulled both the UAT and master branches before continuing.
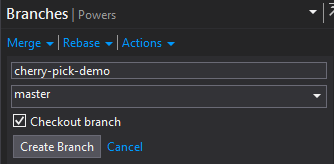
2. Create & Check Out new branch (named “cherry-pick-demo” in this example) in whatever branch you want to merge the change into (master).
3. With your new branch checked out, view the history for the branch that has the commit you want to cherry-pick. In our example, you would right click the UAT branch name and select View History.
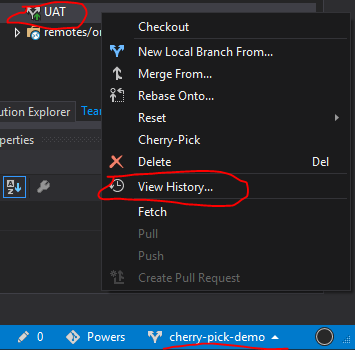
4. Find the commit you want to cherry-pick. Then right click it and select Cherry-Pick.

5. If there are no conflicts between the commit and the branch, the cherry-pick operation will be completed automatically. If there are conflicts, you can follow the same procedure you would use to resolve conflicts when merging branches. (Read “Resolve Merge Conflicts” if you need a reference.)
6. Now you have the changes on your new branch. At this point, you can continue with your development like you would normally. For example: Publish this branch to GitHub and submit a pull request to pull the change into the master branch.
Useful links about cherry-picking
- Cherry-Picking Explained at think-like-a-git.net provides even more information about the cherry-pick operation and how to perform it from the git command line.